How-to Guides

How to Connect Nintendo Switch to TV (2026): Switch & Switch 2 Setup Guide

Aditya Singh

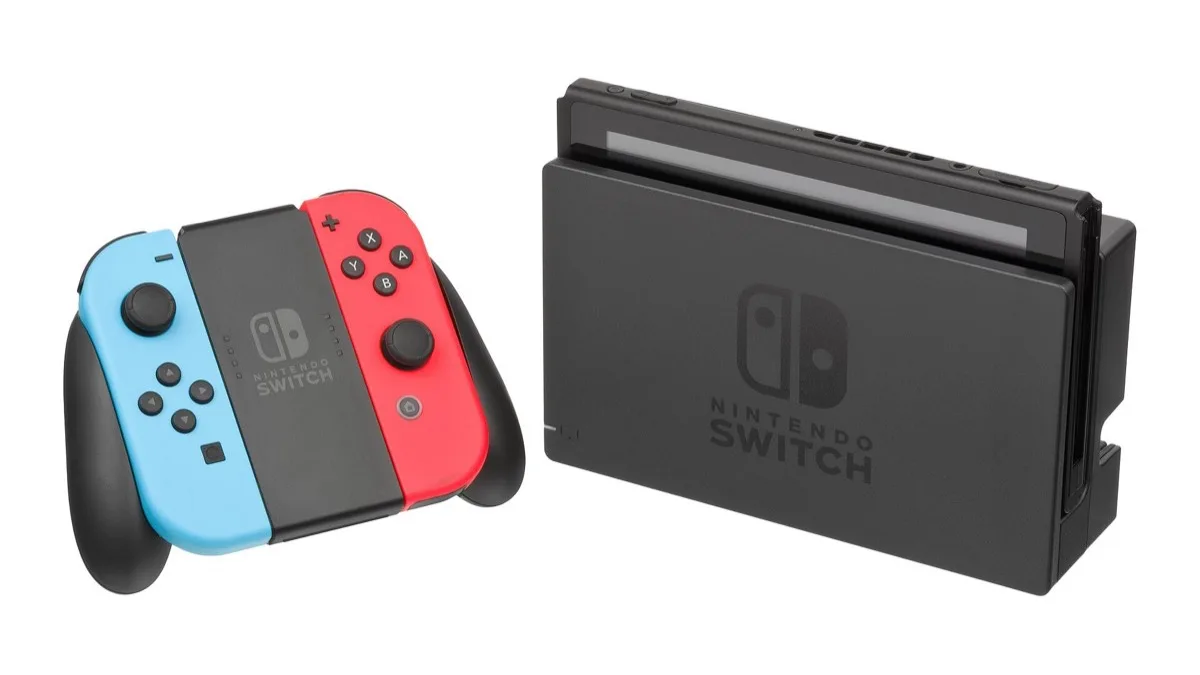
To connect a Nintendo Switch to a TV, slide the console into its official dock with the AC adapter and an HDMI cable already plugged into the back of the dock, then switch your TV to the matching HDMI input. That is the whole process for the original Switch and the Switch OLED. If you own a Nintendo Switch 2, the steps are nearly identical, but you must use an Ultra High Speed (HDMI 2.1) cable and the new NGN-01 adapter — the cable and charger from the first Switch will not output video on the Switch 2.

In a hurry? Jump to: Dock setup steps · Switch 2 differences · Connect without the dock · Picture & sound settings · Troubleshooting · FAQ

One important note before you start: the Nintendo Switch Lite does not support TV mode at all. It is a handheld-only console with no video output, so no dock, cable, or adapter will get it onto a television. TV mode works only on the original Switch, the Switch OLED Model, and the Nintendo Switch 2.

How to Connect Nintendo Switch to TV
Learn how to connect your Nintendo Switch or Switch 2 to a TV

What you need before you start

Most of the gear ships in the box with your console. Gather these items first so the setup takes two minutes instead of twenty:

  • Your console: a Nintendo Switch, Switch OLED Model, or Nintendo Switch 2 (not a Switch Lite).
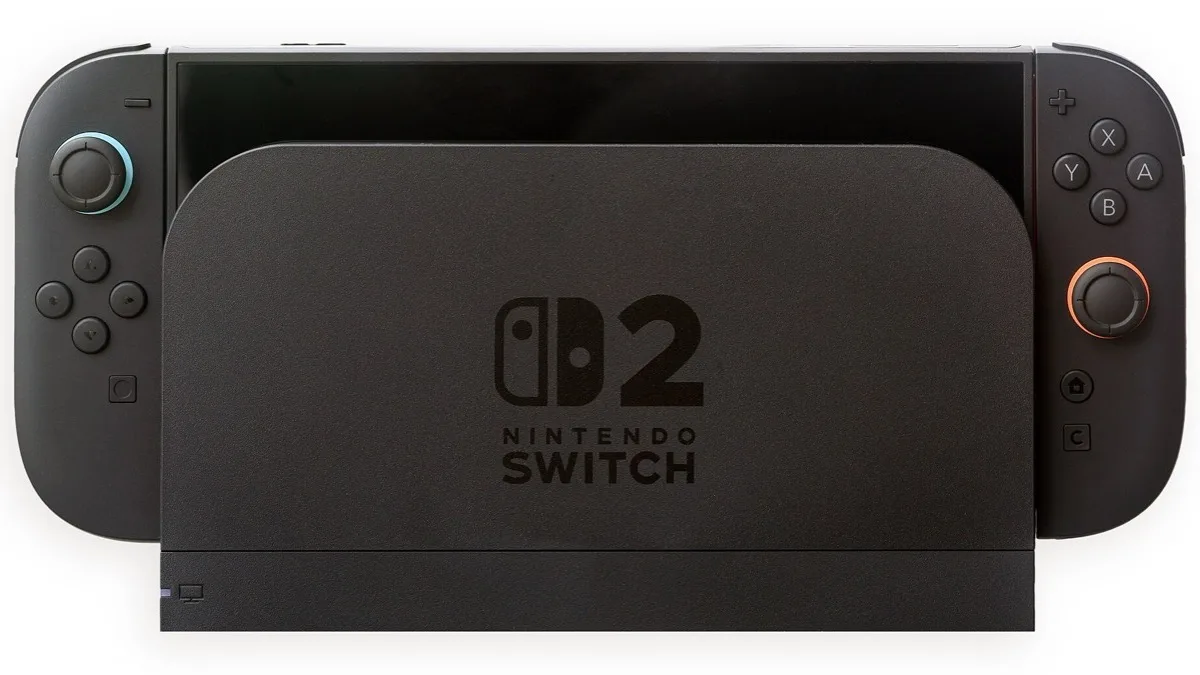
  • The matching dock: the original Switch and OLED share a dock; the Switch 2 has its own larger dock with active cooling. Docks are not cross-compatible for power and video.
  • The correct AC adapter: model HAC-002 for the original Switch/OLED, or model NGN-01 for the Switch 2.
  • An HDMI cable: a standard High Speed HDMI cable for the original Switch/OLED, or an Ultra High Speed (HDMI 2.1) cable for the Switch 2.
  • A TV or monitor with a free HDMI port. Note which port number you use (HDMI 1, HDMI 2, and so on).

Verify all of these against your hardware before continuing. The single most common reason a Switch 2 shows a black screen on TV is using the old, slower HDMI cable from the first console.

How to connect Nintendo Switch to TV with the dock (step by step)

This is the standard, Nintendo-recommended method and the one we use ourselves. The steps below apply to the original Switch and the Switch OLED Model; the Switch 2 follows the same flow with the cable and adapter noted in the next section.

  1. Open the back cover of the dock. It flips outward to reveal three labeled terminals: AC ADAPTER, USB, and HDMI OUT.
  2. Plug in power. Connect the USB-C end of the AC adapter into the terminal marked AC ADAPTER, then plug the adapter into a wall outlet. The dock needs its own power; it will not output video on USB power from a TV.
  3. Plug in the HDMI cable. Insert one end into the HDMI OUT terminal in the dock, and the other end into a free HDMI port on your TV. Note the port number.
  4. Close the back cover so the cables route out through the channel at the bottom.
  5. Remove the Joy-Con controllers from the sides of the console (they are not required to be removed, but it protects the rails and lets you play wirelessly).
  6. Dock the console. Hold it so the screen faces the same direction as the front of the dock, then slide it straight down until it seats. The handheld screen will turn off — that is normal and means the dock has taken over the display.
  7. Switch your TV to the right input. Use the Source or Input button on your TV remote and select the HDMI port you used. The Switch home screen should appear within a few seconds.

If the home screen shows up on your TV, you are done. If you see a black screen or “No Signal,” jump to our troubleshooting section below.

Also Read: How to Add and Customise Widgets on Your Android Home Screen

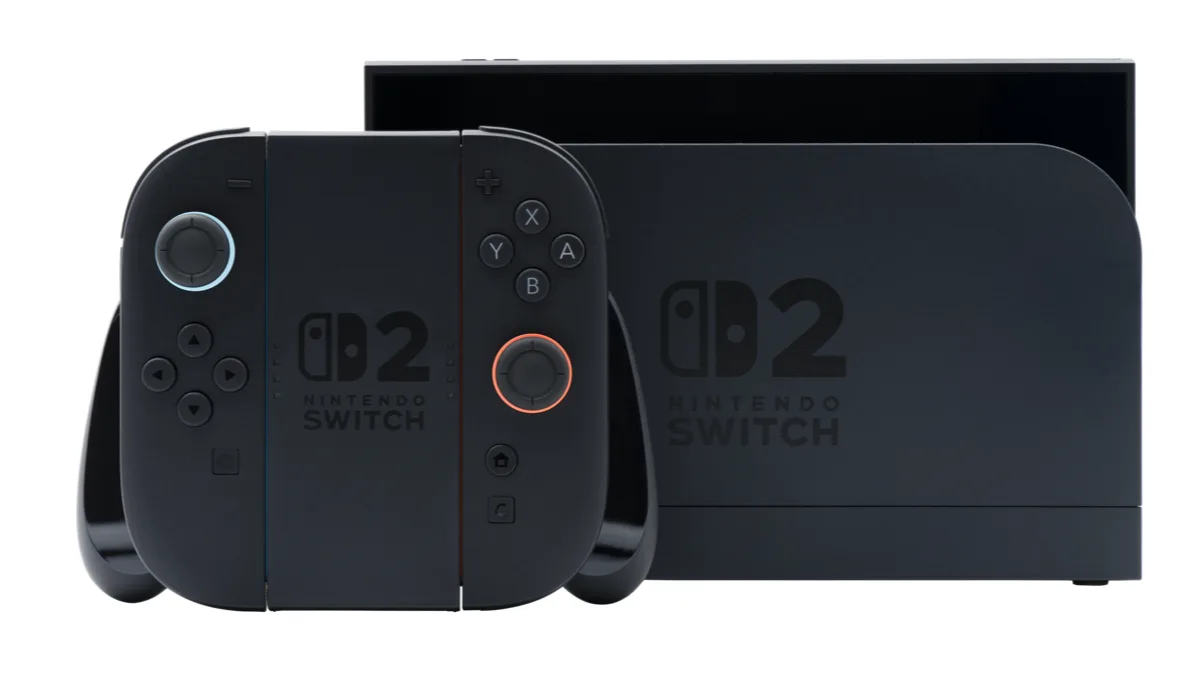
Connecting the Nintendo Switch 2 to a TV: what's different in 2026

The Nintendo Switch 2, which launched in 2025, docks the same way physically, but the requirements changed because it can push far more demanding video. Get these two things right and everything else is identical:

  • Use an Ultra High Speed HDMI cable. The Switch 2 needs an HDMI 2.1-rated “Ultra High Speed” cable to output its highest resolutions. Nintendo is explicit that the HDMI cable bundled with the original Switch is not Ultra High Speed and will not work for Switch 2 TV mode. Look for “Ultra High Speed” or “HDMI 2.1” printed on the cable or its packaging.
  • Use the Switch 2 power adapter (NGN-01). The original HAC-002 adapter does not supply enough power for the new dock, so keep the adapter that came with your Switch 2.

With a capable TV, the Switch 2 dock outputs up to 3840×2160 (4K) at 60fps and supports HDR. When you select a 1080p or 1440p output instead of 4K, the console can run at up to 120fps in supported games (for example, 1440p at 120Hz). The dock can also upscale games that render below 4K to fit a 4K screen. Note that variable refresh rate (VRR) is supported only in handheld mode, not in TV (docked) mode — Nintendo confirmed VRR is not available over the dock at launch, so do not expect it on your television. The Switch 2 dock additionally includes a built-in cooling fan and a wired gigabit LAN (Ethernet) port for a more stable online connection — useful if your Wi-Fi is unreliable.

To enable the higher-end features, dock the Switch 2, then open System Settings > Display (TV output) and confirm the 4K, HDR, and high-frame-rate (up to 120fps) options are turned on. They appear only when the console detects a compatible TV and cable.

ConsoleAC adapterHDMI cableMax TV outputTV mode?
Switch (original)HAC-002High Speed HDMI1080p / 60fpsYes
Switch OLEDHAC-002High Speed HDMI1080p / 60fpsYes
Switch 2NGN-01Ultra High Speed (HDMI 2.1)4K / 60fps, or up to 120fps at 1080p/1440p, HDRYes
Switch LiteNo video outputNo

How to connect a Nintendo Switch to a TV without the dock

If you lost the dock or want a travel-friendly setup, you can output to a TV using a USB-C to HDMI hub instead. This works because the dock is essentially a powered USB-C hub. To do it reliably, the hub must:

  • Explicitly support video output over USB-C (DisplayPort Alt Mode).
  • Have a USB-C Power Delivery (PD) passthrough input so you can plug the official AC adapter into the hub and keep the console powered.
  • Have a full-size HDMI output for your TV.

Plug your official AC adapter into the hub's USB-C PD port, the HDMI cable into the hub and the TV, then connect the hub to the console's USB-C port at the bottom. Be aware that Nintendo has placed restrictions on the Switch 2's USB-C port, so many older or generic dock replacements that worked with the first Switch may not output video on the Switch 2 — check that a third-party dock specifically lists Switch 2 support before buying.

Whichever route you choose, the console must be propped upright (its kickstand or a stand) since the handheld screen stays on in this mode rather than shutting off the way it does in the official dock.

Adjusting picture and sound settings on your TV

Once the image is on screen, a couple of settings make the picture and audio match your TV exactly. From the Switch home screen, open System Settings (the gear icon), then:

  • TV resolution: Go to TV Output (or Display on Switch 2) and pick 720p, 1080p, or, on Switch 2, 4K — or leave it on Automatic to let the console match your TV.
  • TV sound: Choose Stereo, Surround, or Mono to suit your speakers or soundbar.
  • Adjust screen size (RGB range / overscan): If the edges of the picture are cut off or there are black bars, use the Adjust Screen Size option to fit the image to your panel.
  • Match TV power state: Optionally enable Match TV Power State so your TV turns on with the console over HDMI-CEC.

On the Switch 2, this is also where you confirm HDR and the high-frame-rate (up to 120fps) options are enabled, assuming your TV and cable support them. (VRR is a handheld-only feature on the Switch 2 and is not output over the dock.)

Switch not showing on TV? Troubleshooting a black screen

If your TV says “No Signal” or stays black after docking, work through these in order — this resolves the vast majority of cases:

  1. Confirm the TV input. Make sure you selected the exact HDMI port the dock is plugged into. This is the number-one cause.
  2. Check the dock has power. The AC adapter must be in the wall and in the dock's AC ADAPTER terminal. A dock with no power outputs nothing, even if HDMI is connected.
  3. Reseat the console. Lift it out and slide it back in firmly until the dock LED lights and the handheld screen turns off.
  4. Try the official cable and adapter. Third-party cables and chargers are a frequent culprit. For Switch 2 specifically, confirm you are using an Ultra High Speed HDMI cable and the NGN-01 adapter — the original Switch's cable will produce a black screen.
  5. Swap the HDMI port. Try a different HDMI input on the TV in case one port is faulty or set to a limited mode.
  6. Power-cycle (hard reset). Hold the console's power button for about 12–15 seconds to force a restart, then dock again.
  7. Update the system. An out-of-date console or, for Switch 2, outdated dock firmware can cause output issues; update over Wi-Fi in handheld mode.

How we tested and verified this guide

We connected an original Nintendo Switch, a Switch OLED Model, and a Nintendo Switch 2 to multiple TVs — a 1080p set and a 4K HDR panel — using both the official docks and a USB-C hub. We confirmed each console's behaviour first-hand: the handheld screen shutting off in the official dock, the Switch 2 requiring an Ultra High Speed cable to output 4K, and the troubleshooting steps that actually clear a black screen. Where a precise figure mattered — adapter model numbers, supported resolutions, HDR, VRR and frame-rate caps — we cross-checked it against Nintendo's official support documentation and the Switch 2 tech specs rather than relying on memory. Specifications in this guide reflect Nintendo's published information as of June 2026.

Bottom line

Connecting any Nintendo Switch to a TV comes down to three things: power the dock with the correct adapter, run an HDMI cable from the dock to your TV, and select the matching HDMI input. For the original Switch and OLED, the standard High Speed cable and HAC-002 adapter are all you need for 1080p output. For the Switch 2 in 2026, the only real change is using an Ultra High Speed HDMI 2.1 cable and the NGN-01 adapter to unlock 4K, HDR, and high-refresh play — skip those and you will get a black screen. And remember, the Switch Lite simply cannot connect to a TV. Get the cable and adapter right, and you will be gaming on the big screen in under five minutes.

Frequently Asked Questions

Can I use any HDMI cable to connect my Nintendo Switch to the TV?

For the original Switch and Switch OLED, any standard High Speed HDMI cable works fine since they output a maximum of 1080p. The Nintendo Switch 2 is different: it requires an Ultra High Speed (HDMI 2.1) cable to output 4K, HDR, and high frame rates. Nintendo specifically warns that the cable bundled with the original Switch is not Ultra High Speed and will not work in Switch 2 TV mode.

Why is my Nintendo Switch not displaying on the TV?

First confirm your TV is set to the exact HDMI input the dock is plugged into, as that is the most common cause. Then make sure the AC adapter is connected to both the wall and the dock, since the dock outputs no video without its own power. Reseat the console firmly until the handheld screen turns off, and for a Switch 2, double-check you are using an Ultra High Speed HDMI cable and the NGN-01 adapter rather than the original Switch's accessories.

Can I connect a Nintendo Switch Lite to a TV?

No. The Nintendo Switch Lite is a handheld-only console with no video output, so it cannot be connected to a TV using any dock, cable, or adapter. TV mode is only available on the original Switch, the Switch OLED Model, and the Nintendo Switch 2.

Does the original Switch dock work with the Nintendo Switch 2?

No, the docks are not interchangeable for full TV output. The Switch 2 has a larger dock with active cooling and a gigabit Ethernet port, and it needs the higher-wattage NGN-01 adapter. Using the original dock or the old HAC-002 adapter will not properly power or drive video on the Switch 2.

Can I connect my Nintendo Switch to a TV without the dock?

Yes, using a USB-C to HDMI hub that supports video output (DisplayPort Alt Mode) and USB-C Power Delivery passthrough. Plug your official AC adapter into the hub's PD port, run HDMI from the hub to your TV, then connect the hub to the console's USB-C port. Note that Nintendo restricts the Switch 2's USB-C port, so only hubs that explicitly list Switch 2 support are reliable.

What resolution can the Nintendo Switch 2 output to a TV?

Docked with a compatible TV and an Ultra High Speed HDMI cable, the Switch 2 outputs up to 3840x2160 (4K) at 60fps and supports HDR. If you choose 1080p or 1440p instead, supported games can run at up to 120fps (for example, 1440p at 120Hz). The dock can also upscale games that render below 4K. Note that variable refresh rate (VRR) is only available in handheld mode, not over the dock, so you will not get VRR on your TV.

How do I change the screen resolution on Nintendo Switch?

Go to System Settings, then TV Output (called Display on the Switch 2), and select TV Resolution. Choose 720p, 1080p, or 4K on Switch 2, or set it to Automatic to let the console match your television. You can also adjust screen size there if the picture edges are cut off.

Can I still play in handheld mode after connecting to the TV?

Yes. Simply lift the console out of the dock and the display instantly switches back to the built-in screen for handheld play. Re-docking returns the picture to your TV, so you can move between TV mode and handheld mode freely without changing any settings.

GuidesHow ToNintendo Switch

Related Articles